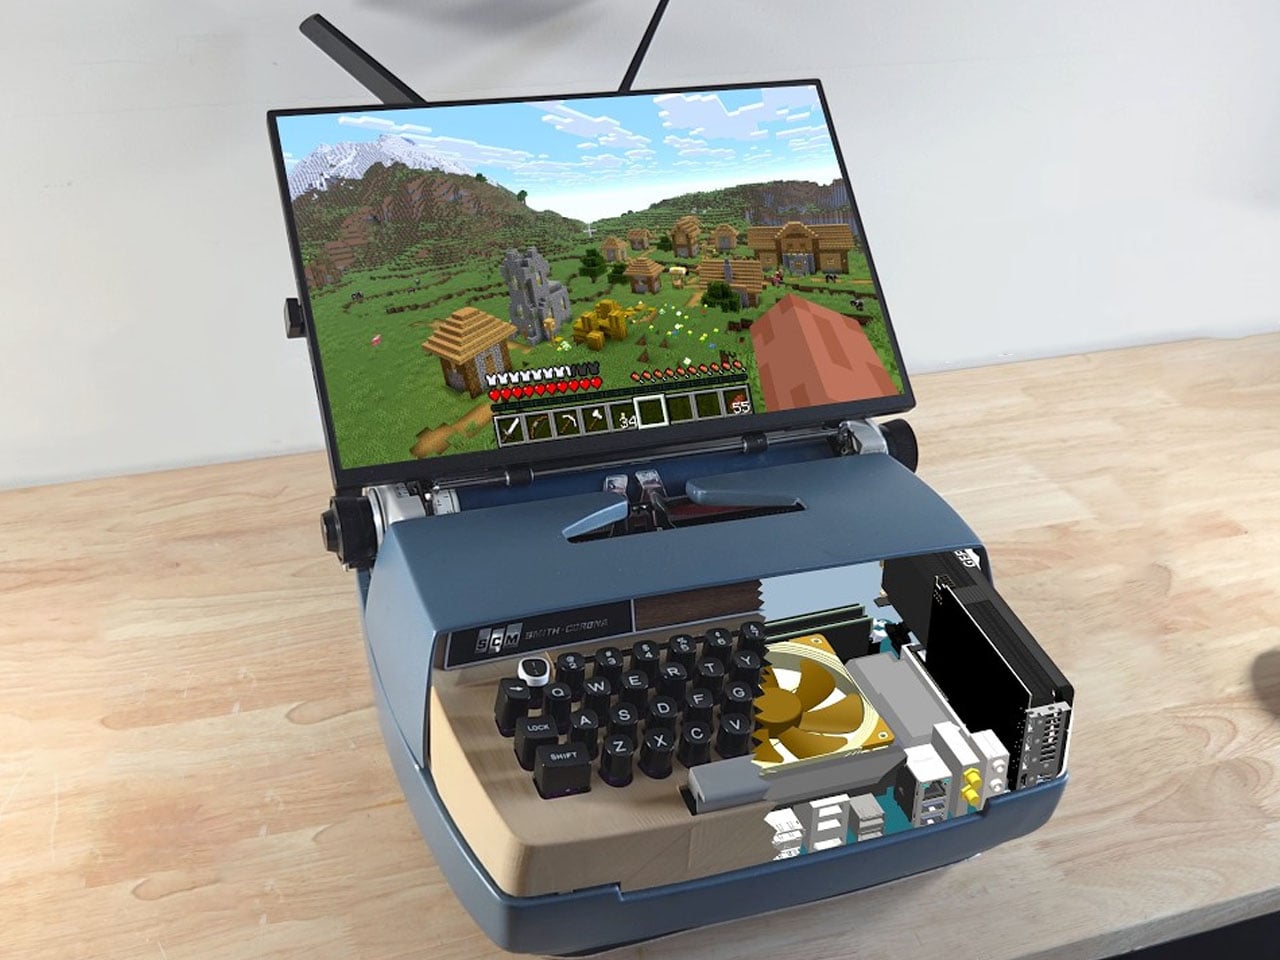
"Fitting a computer inside a typewriter requires a lot of brainstorming about which components are useful and which can give way to the PC components. Sounds easy, doesn't it? The art here is to be very careful when removing unwanted parts like the keyboard, motor, and side brackets, while still retaining the slide's functionality via the hammers and the main movement."
"Before sorting this bit of the DIY, the first step is to sort out the keyboard assembly by preplacing it with a modern keyboard that is made from scratch, using the keys of the keyboard to keep the theme alive. This is where 3D printing comes in by taking a 360-degree scan of the typewriter's keyboard and modelling the desired keyboard case that has more height for fitting in all the PCB components of a modern keyboard."
"Next comes the easy bit, where the keycaps are 3D modelled and printed to test fit the adapters. Attaching them to the corresponding key strokes does the job. The backplate is a cakewalk, and the parts are done. Finally, all the parts are put together, and the keyboard for the typewriter is ready. Then it's time to connect the keyboard to the complex working of the computer using a servo motor."
A DIYer converted an old typewriter into a functional gaming PC by removing nonessential mechanical parts while preserving the slide, hammers, and main movement. The builder fitted a motherboard, power supply, and graphics card into the freed interior. The original keyboard was replaced with a custom modern keyboard built from scratch using 3D-scanned key geometry, a taller printed case to house PCBs, printed keycaps, and a manufactured PCB matrix. The custom keyboard connects to the computer via a servo motor that also drives the typewriter slide and bell. The setup was tested with a laptop, proving the slide and bell work alongside computing hardware.
Read at Yanko Design - Modern Industrial Design News
Unable to calculate read time
Collection
[
|
...
]